Quick Start
Start
When the “SRT Streamer PRO” service is running (see the here ), you can open http://127.0.0.1:8082 in your browser.
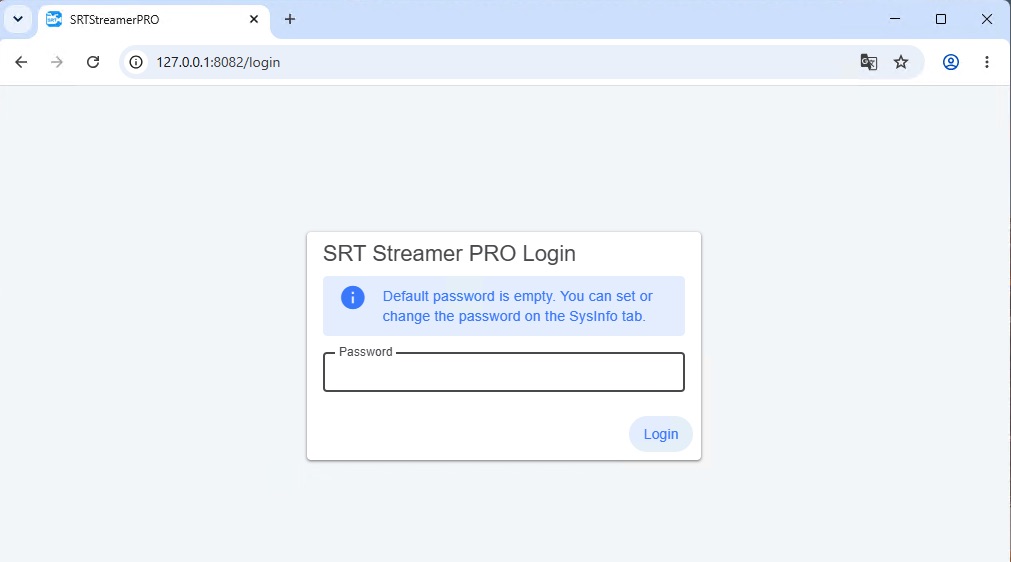
By default, the login field is empty — just click the button to sign in. You can set a password later in SysInfo.
Workflow
So let’s look at the basic case: you need to stream few cameras to your remote Studio.
In this case, it is assumed that all streams should have the same encoding params such as fps, frame size, codec. For example 1080@50i, 10M bs, h264 And common destination params : SRT server & port , latency, passphrase etc.
in this case the order of actions is as follows:
go to Streaming Setup and fill in the encoding Profile
go to Dashboard and press Add stream for each camera: specify the input device and Stream ID. You can also optionally specify other settings. e.g. which audio channels to use.
press start button
Below is more detail on each step.
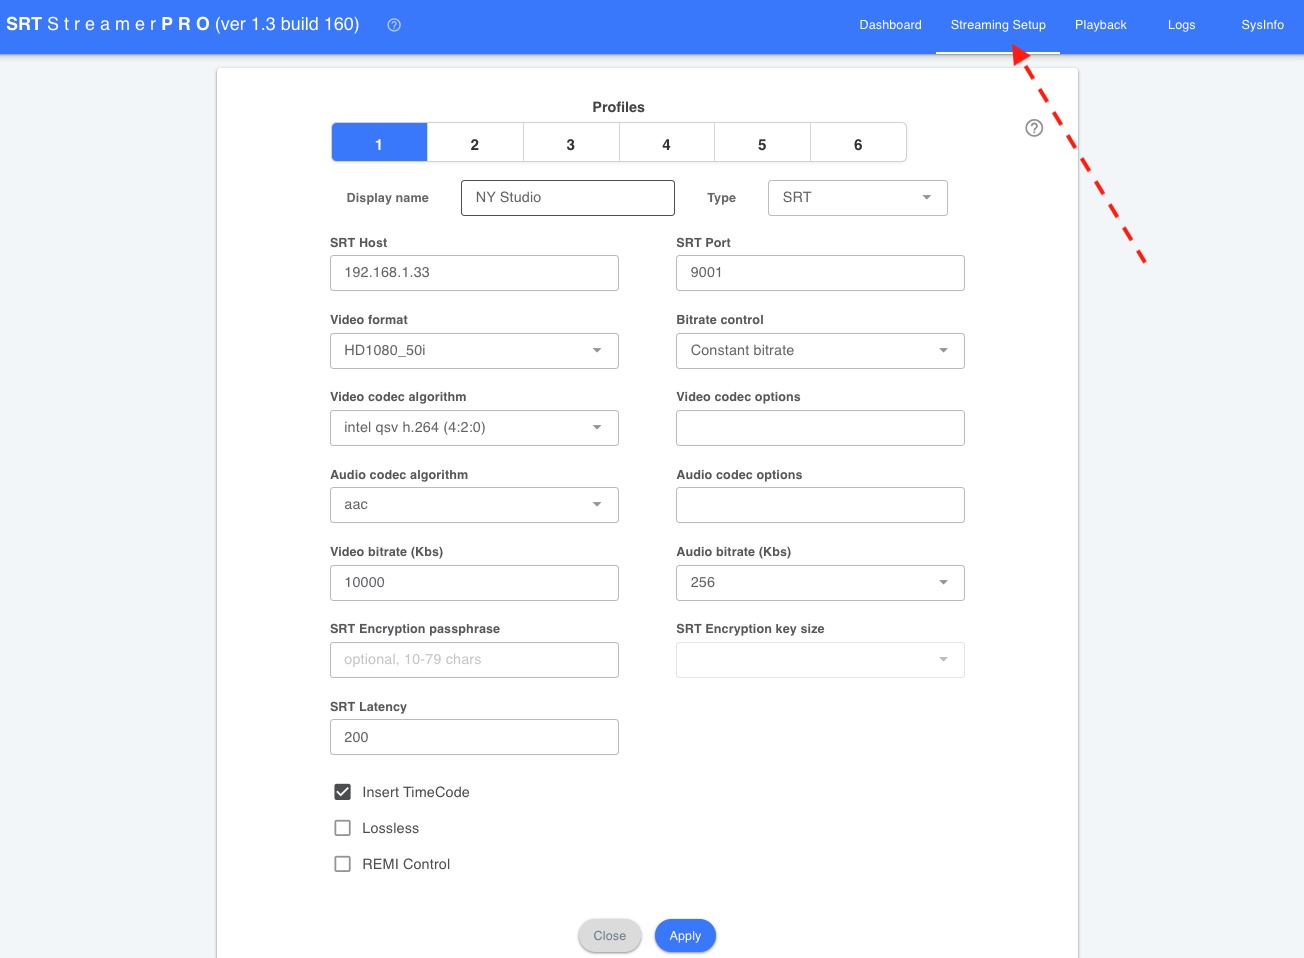
Step 1: Streaming Setup
In this window you need setup Destination host/port and parameters for streams.
SRT Streamer PRO will be capture sources and converts every feed to this format, encode and send to Destination server.
More info about this see here
Step 2: Add stream
Go to Dashboard press button Add stream. In this window select Profile, source and type stream id (optional). When this stream will be started then it will use params from Profile (destination server, fps, bitrate etc).
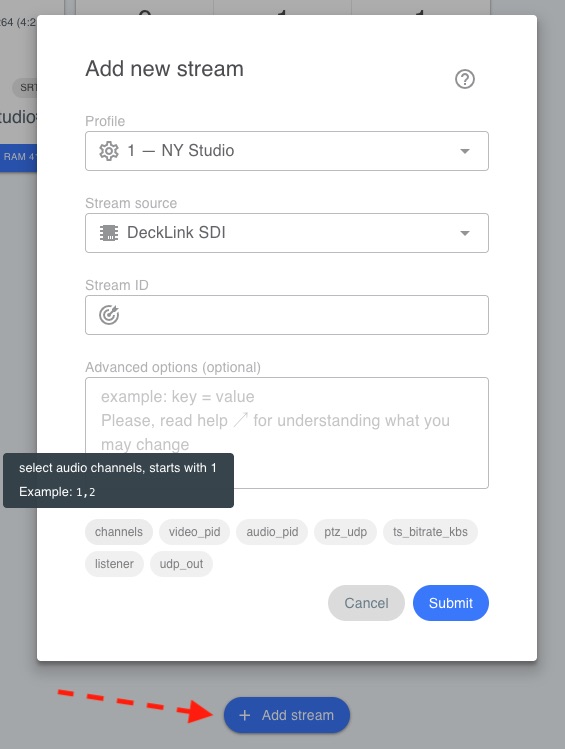
Additional options are available, such as selecting audio channels , video_pid and more.
More info about this see here
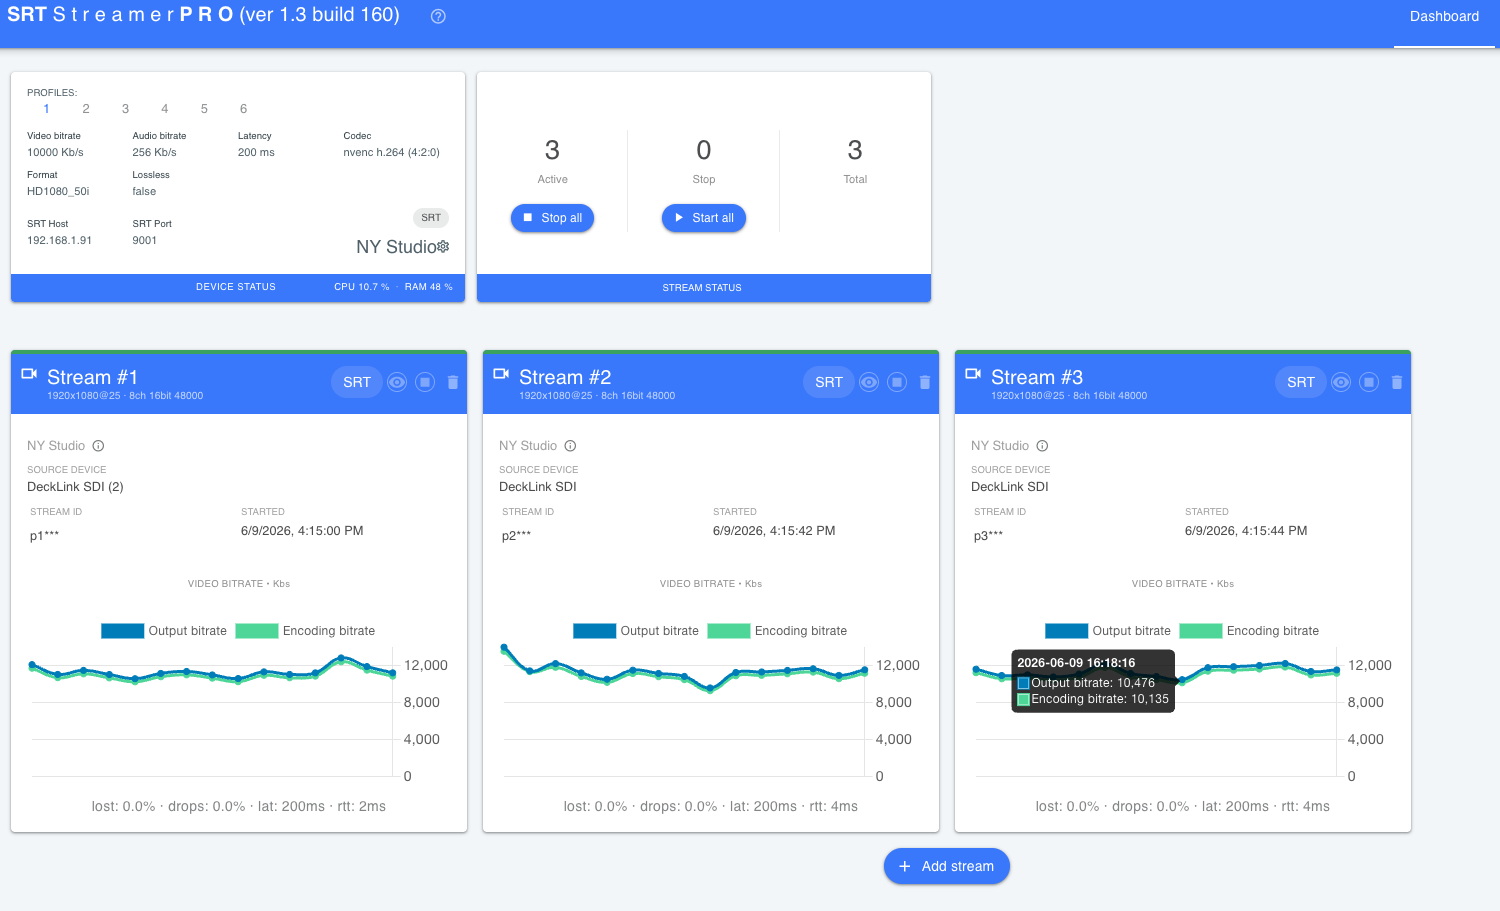
Step 3: Start stream
Use button “Start all” for quick start all streams.
Dashboard shows info about current streams.